Usage
To run PCBooth, execute:
pcbooth
On first use, PCBooth will generate a default configuration file blendcfg.yml in the current directory.
This file can be adjusted to change output render results.
Required input files
By default PCBooth operates on a PCB Blender model found in the fab/ subdirectory in the directory from which the tool is executed. This file is the output of gerber2blend and/or picknblend tools.
However you can provide a path to any other Blender model file to PCBooth to render it using the following switch:
pcbooth -b path/to/model.blend
Outputs
Resulting renders will be saved in directories specified in blendcfg.yaml file:
RENDER_DIR: blender_renders
ANIMATION_DIR: assets/previews
These directories will be created in the current directory.
Additional CLI arguments
PCBooth supports the following command arguments:
-c PRESET_NAME- uses a selectedblendcfgpreset (see: Custom config settings)-d- enables debug logging-u– merges additional settings from the template into the local configuration and exits. Existing user-defined settings remain unchanged. If noblendcfg.yamlfile exists in the current directory, it is copied from the template instead.-R- resets the local configuration to match the template, overwriting any user-defined settings, then exits. If noblendcfg.yamlfile exists in the current directory, it is copied from the template instead.-l- prints source Blender model object and collection hierarchy to console-g- enforce rendering using GPU device, terminate script if no such device is available.
Rendering jobs
PCBooth comes with rendering jobs that can be enabled to obtain various static images and animations.
Note
Custom rendering jobs can be added to PCBooth. For more information, see: Rendering jobs chapter.
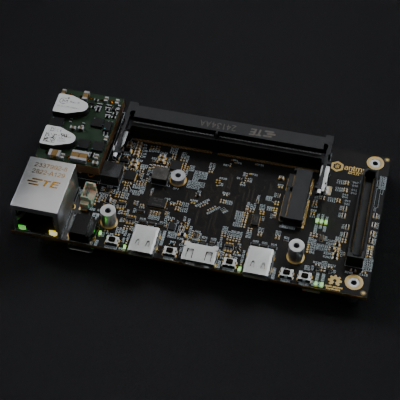
Static image rendering job.
This module handles rendering of static images of a model on selected backgrounds using various camera angles.
Yields renders named <camera_angle>
This rendering job supports the following additional parameters:
* `FRAMES`: ["start", "end"], [int] or ["from_blend"] - list of keyword strings or integers allowing to define which keyframes to render. `start, end` will render first and last frame derived from keyframes defined in the .blend file. `int` will render frames specified in the list of integers. `from_blend` will render first and last frame defined by animation frame range in Output properties of the .blend file.
This module handles rendering of animations showcasing the model (usually PCB) flipped from TOP to BOTTOM position. Flips will be rendered for all cameras specified in config file. Always overrides background to “transparent” and positions to “TOP” and “BOTTOM”.
Yields renders named <camera_angle>
Camera transition animation rendering job.
This module handles rendering of animations showcasing the model transitioning from one camera angle to another. Transitions will be generated for all camera combinations specified in the configuration, but only within the same position (for example left to right bottom side, but never left top to right bottom). Always overrides background to “transparent”.
Yields renders named <camera_angle>
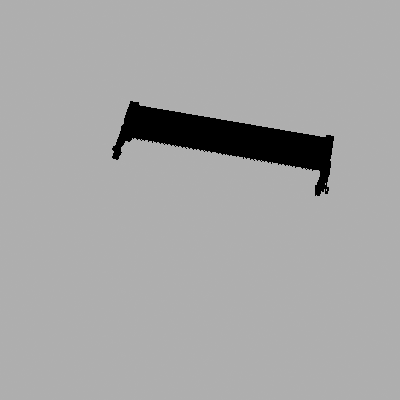
Component binary mask rendering job.
This module handles fast rendering of static images of each component in a model component using a black and white color pallette. These images can act as binary masks, enabling precise identification of the component’s location within a full-color render. Masks are rendered for each camera in each model position specified in config.
Yields renders to the <RENDER_DIR>/masks/<full/covered>/
* for PCBs, designator of the rendered component is used as name
* for other types of model, full rendered object name is used
This rendering job supports the following additional parameters:
* `FULL` - boolean switch, enables mask renders as full component silhouette
* `COVERED` - boolean switch, enables mask renders as components partially obscured by other components
* `HIGHLIGHTED` - list of strings to restrict components rendered by specified designators (PCB type model only)
* `FRAMES`: ["start", "end"], [int] or ["from_blend"] - list of keyword strings or integers allowing to define which keyframes to render. `start, end` will render first and last frame derived from keyframes defined in the .blend file. `int` will render frames specified in the list of integers. `from_blend` will render first and last frame defined by animation frame range in Output properties of the .blend file.
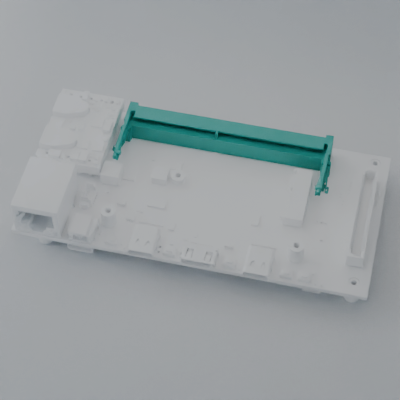
Highlighted components images rendering job.
This module handles rendering of static images of a model with simplified color pallette and its components highlighted using contrasting color. This can be used to provide images for hardware documentation, to pinpoint specific components.
Yields renders to the <RENDER_DIR>/highlights/ directory. Filename is determined based on model type:
* for PCBs, designator of the rendered component is used as name (adds <camera> suffix if camera is other than "TOP")
* for other types of model, full rendered object name is used with <camera><position initial> suffix
Additional linked objects will be hidden for rendering.
This rendering job supports the following additional parameters:
* `HIDDEN` - list of strings to hide components from render by specified designators (PCB type model only)
* `HIGHLIGHTED` - list of strings to restrict components highlighted by specified designators (PCB type model only)
* `FRAMES`: ["start", "end"], [int] or ["from_blend"] - list of keyword strings or integers allowing to define which keyframes to render. `start, end` will render first and last frame derived from keyframes defined in the .blend file. `int` will render frames specified in the list of integers. `from_blend` will render first and last frame defined by animation frame range in Output properties of the .blend file.
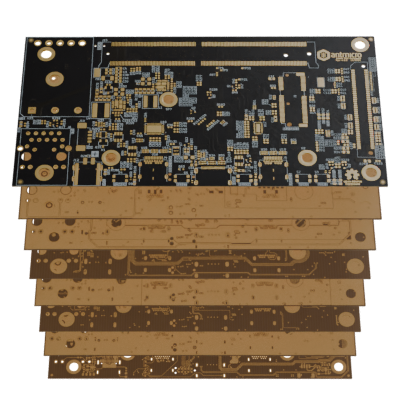
PCB stackup image rendering job.
This module handles rendering of static images of a PCB in exploded view. Each layer gets rendered by hiding all the layers above it. All objects imported on the PCB are hidden for rendering.
Yields renders named “layer
Note
This rendering job is only compatible with gerber2blend output PCB models.
Animation rendering job.
This module handles rendering animation from keyframes that are predefined by user and saved within rendered .blend file. It supports using various camera angles and selected backgrounds.
Yields renders named <camera_angle>
This rendering job supports the following additional parameters:
* `FRAMES`: ["start", "end"], [int] or ["from_blend"] - list of keyword strings or integers allowing to define range of frames to render. `start, end` will render sequence from first to last frame derived from keyframes defined in the .blend file. `int` will render range of frames between keyframes specified by two integers. `from_blend` will use animation frame range in Output properties of the .blend file.
Model types
PCBooth will recognize model types based on found objects’ structures or assign it based on values stored in the blendcfg.yaml file.
This is implemented to properly group objects in the scene to better frame them and allow type-specific features.
If no specific model type is recognized, all objects saved within the .blend file will be framed by cameras.
PCB type
This model type is assigned if gerber2blend/picknblend output PCB model is read.
by default entire model gets rotated horizontally before render (longer edge towards viewer) - can be disabled by setting
SCENE/ADJUST_POSE: Falseif components are imported, they are differentiated between top and bottom sides
Single object type
This model is assigned if there’s exactly one object in a scene.
by default, the entire model gets rotated using value stored in
DISPLAY_ROTcustom property - this can be disabled by settingSCENE/ADJUST_POSE: Falsebefore render, origin point of the model will be temporarily moved to geometric center of the model to make position changes more aesthetically appealing
blendcfg.yaml override
A rendered object or group of objects can be manually specified in the OBJECT section in the configuration file. This will result in camera framing the object choice, while leaving rest of the scene contents in the background.
To render a selected object present in the .blend file, use the following syntax:
  OBJECT:
    ...
    RENDERED_OBJECT: Object/<object name>
Alternatively, to render the entire collection as a single rendered object, use the following syntax:
  OBJECT:
    ...
    RENDERED_OBJECT: Collection/<collection name>
Using a custom camera
Aside from preset cameras (see: Configuring blendcfg.yaml: CAMERAS), PCBooth can pick up a user-defined custom camera saved within a rendered Blender model.
For the user camera to be recognized as valid, simply name it camera_custom.
To enable rendering using the custom camera, enable the following setting in blendcfg.yaml:
  CAMERAS:
    ...
    CUSTOM: True
Note
Custom camera may be aligned to an object before rendering, so that the object is in the center of camera’s FOV. This feature alters camera parameters defined in input .blend (e.g. position, rotation, focal length, sensor size). To enable automatic custom camera adjustments use ADJUST_CAM switch in blendcfg.yaml.