Usage
In order to use the scripts described in this chapter, you need the Audio latency tester board flashed with firmware from the flashing hardware section.
The scripts require Python packages from the installing dependencies chapter and sufficient access rights to the connected USB devices.
Hardware preparation
Before proceeding further, it is necessary to connect the microphone board to the audio latency tester board. The microphone board is a small footprint carrier board for a PDM microphone. Two of these boards can be joined for a stereo setup (after configuring two microphone boards for a left and right channel respectively).
To select the microphone board’s channel, populate the resistor in one of the two orientations:
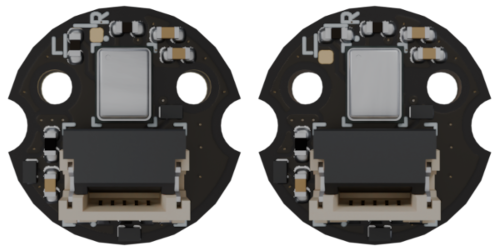
Figure 4 Microphone board left/right channel selection
Connect microphone boards to the audio latency tester board with a 5 pin, 0.5 mm pitch, same-side flat flexible cable (example MPN:
05-05-D-0050-A-4-06-4-T):
Caution
Make sure to disconnect all the power sources from the audio latency tester board before plugging or unplugging the microphone boards
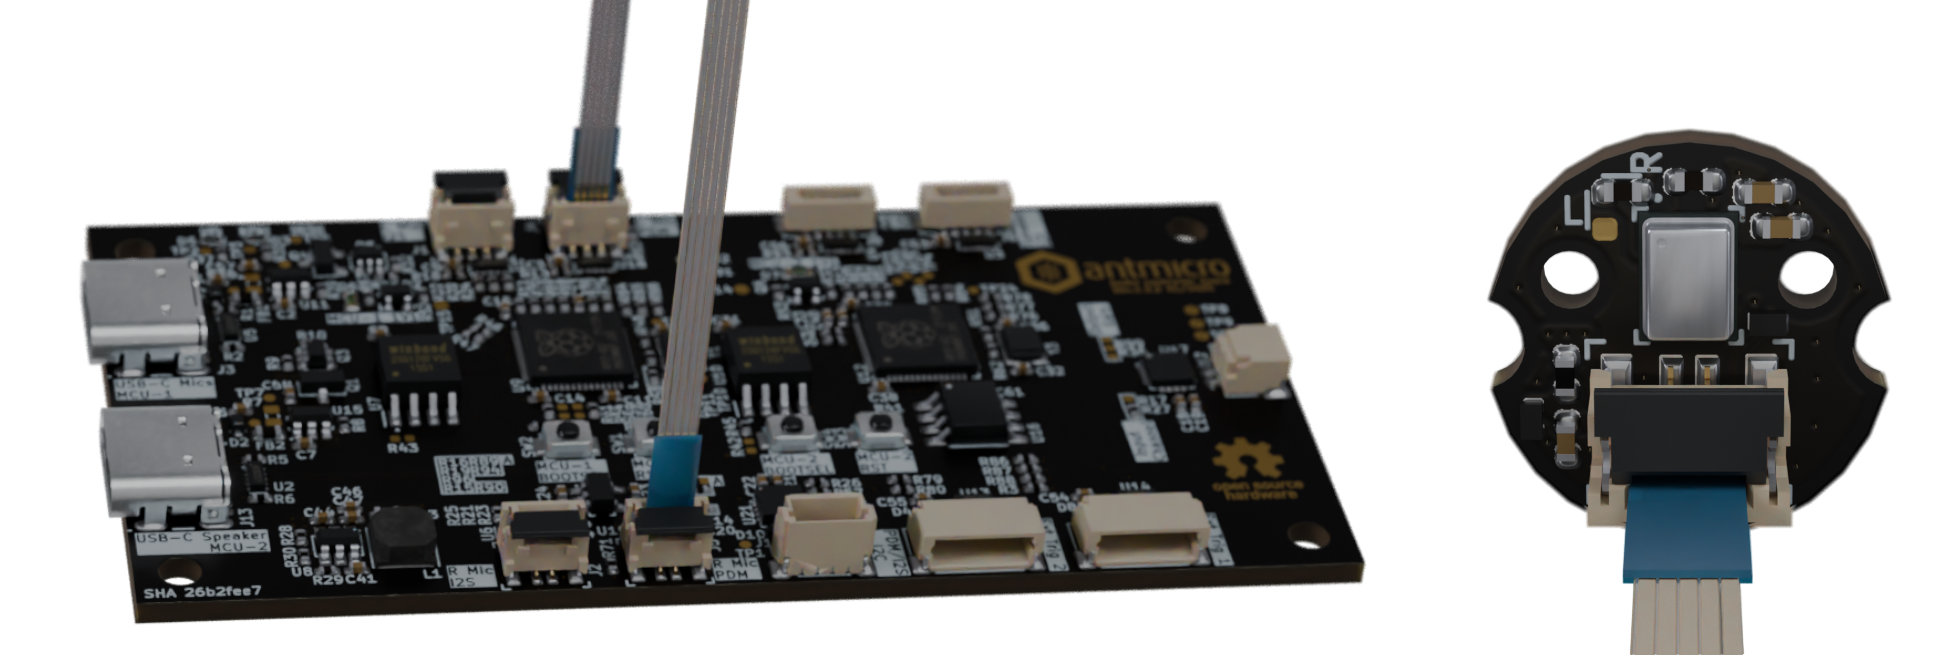
Figure 5 FFC connections
The audio latency tester board has two connectors for the microphone boards: J4 and J5.
Note
The current version of the RP2040 firmware supports recording from only one microphone at a time. By default, the audio from microphone board configured as the left channel will be processed.
Tip
To insert the FFC, push the connector’s lever down, insert the FFC and pull the lever up
Connect an external speaker to the speaker connector:

Figure 6 Speaker connectors
Trigger input and outputs can be connected to the
J6andJ7connector. For more detailed pinout information, refer to the audio latency tester board repository.Connect MCU-1 and MCU-2 USB-C to your PC.
With
lsusb, you should see that both the devices are recognized:
Bus 001 Device 021: ID cafe:4011 Raspberry Pi RP2040
Bus 001 Device 022: ID cafe:4010 Raspberry Pi RP2040
Standalone playback/capture scripts
Before performing the measurements, it is possible to test the audio playback and audio capture.
Activate the virtual environment:
source .venv/bin/activate
Audio playback
In order to play an audio file, provide a .wav file as argument to the audio_playback.py script:
python3 audio_playback.py <file>
The scripts outputs timestamps of the played audio sections (per every 32 audio samples) - timestamps-playback.log
Tip
Play the example audio file with:
python3 audio_playback.py 1s_44100_2ch_16b.wav
Audio capture
In order to capture audio and save it to a .wav file, use the audio_capture.py script:
python3 audio_capture.py <file>
Output files from this script include:
Recorded audio
.wavfileTimestamps of 16 audio samples long recorded sections -
timestamps-capture.log
Synchronized audio capture and playback
To get accurate audio latency measurements, both the MCUs need to be in sync.
When using the play_capture.py script, the playback MCU will trigger the capture MCU right before the audio playback is started.
Make sure the virtual environment is activated:
source .venv/bin/activate
And then run:
python3 play_capture.py <file>
Output files from this script include:
Recorded audio
out.wavfileTimestamps of recorded audio sections (per every 16 audio samples)
Timestamps of played audio sections (per every 32 audio long)
Tip
Environmental conditions may vary.
If there is a problem with the speaker or microphone volume, use --volume-play <default:4000> and --volume-capture <default:100>.
Play the example audio file with:
python3 play_capture.py --duration=1 1s_44100_2ch_16b.wav
Data interpretation
After performing synchronized audio capture and playback, the recorded audio can be compared with the reference (played) audio file.
The analyze.py script located in the automated_test folder can match the sound starting/stopping to associate the moments in time between wav files.
python3 ./automated_test/analyze.py <reference_file> <recorded_file>
The script outputs a results.csv file with each matched starting/stopping moment from the .wav files listed with a timestamp.
Tip
To compare recorded audio with the example audio file use:
python3 ./automated_test/analyze.py 1s_44100_2ch_16b.wav out.wav
Audio latency of the measurement system prototype itself was measuread as 3.31 ms.
The reference recordings and calculations can be found in the doc/base-system-latency-measurements folder.
Example measurements
This section contains example audio latency measurements, for better visualization of the process. Measurements were performed on two systems:
Bluetooth 5.2 headset with a PC
Google Meet connection via WiFi
Bluetooth 5.2 headset latency measurement
The device under test consisted of:
PC with Debian 12 system with a Bluetooth card
A wireless headset (speakers + microphone) compatible with Bluetooth 5.2
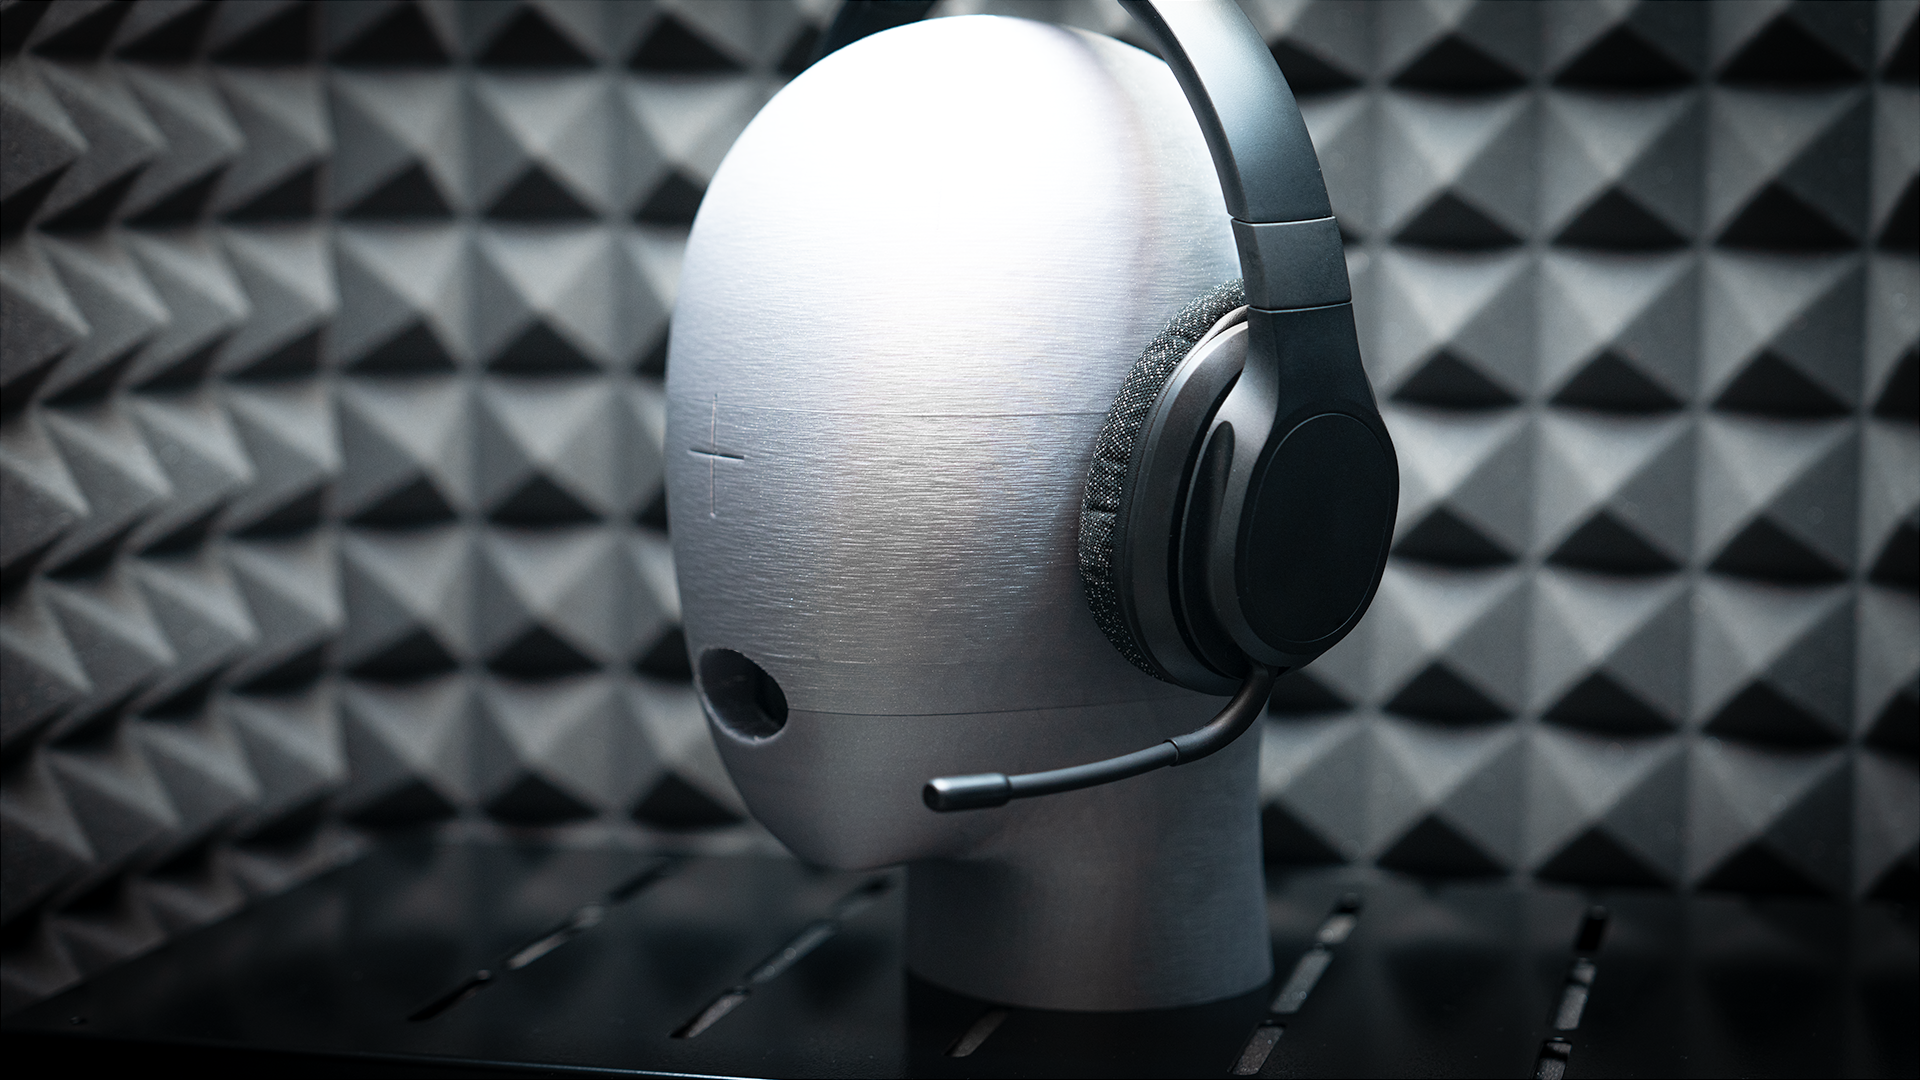
Figure 7 Wireless headset testing setup
The PC was configured to loopback the audio from the headset’s microphone back to the headset’s speakers. For this specific configuration following command was used:
pw-link bluez_input.3F_21_BD_E1_4F_44.0 bluez_output.3F_21_BD_E1_4F_44.1
The test procedure consisted of following steps:
Audio bleed recording - without the device under test ie.: the headset was muted.
python3 play_capture.py --duration=1.5 --volume-play 30000 1s_44100_2ch_16b.wav --out-wav background.wav
This recording was later used to remove overlap between the playback gathered directly by the latency tester microphone and the playback passed through the device under test.
Audio latency measurement recordings - with the device under test active ie.: the headset was un-muted and its microphone was on:
python3 play_capture.py --duration=1.5 --volume-play 30000 1s_44100_2ch_16b.wav --out-wav out1.wav
In total, 10 recordings were made
Background removal - The recorded
background.wavwas removed from the audio latency measurement recordings, using Short-Time Fourier Transform.
python3 remove_background.py out1.wav background.wav out1-clean.wav
Automated calculation analyze- Following scripts detects the audio start and stop moments. Then, it compares them with the original audio file and calculates the delays.
python3 ./automated_test/analyze.py 1s_44100_2ch_16b.wav out1-clean.wav out2-clean.wav out3-clean.wav out4-clean.wav out5-clean.wav out6-clean.wav out7-clean.wav out8-clean.wav out9-clean.wav out10-clean.wav
The resulting results.csv spreadsheet was then used to calculate the average latency: 375ms.
Note
Keep in mind that this latency includes: Bluetooth data transmission (both ways) and data processing (in the headset and the PC’s operating system)
Recordings from that test can be found in the doc/bt-headset-latency-measurements folder.

Figure 8 Recorded and processed audio waveforms
Google Meet connection latency measurement
The device under test consisted of:
PC with Debian 12 system and Google Meet running in a Google Chrome web browser
An Android smartphone with the Google Meet application
Both devices were connected to a Google Meet meeting via the same Wi-Fi network. A speaker connected to the audio latency tester board was placed in front of the smartphone, while a microphone board was attached to headphones connected to the PC.
10 recordings were made using:
python3 play_capture.py --duration=1.5 --volume-play 400 --volume-capture 200 1s_44100_2ch_16b.wav --out-wav out1.wav
and were later interpreted with:
python3 ./automated_test/analyze.py 1s_44100_2ch_16b.wav out1.wav out2.wav out3.wav out4.wav out5.wav out6.wav out7.wav out8.wav out9.wav out10.wav
The resulting results.csv spreadsheet was then used to calculate the average latency: 257 ms.
Recordings from that test can be found in the doc/meet-latency-measurements folder.

Figure 9 Recorded and reference audio waveforms