Web UI
When Protoplaster is running in server mode, it serves a Web UI which can be used for remote configuration and tests triggering. It also supports controlling other devices running Protoplaster in server mode from a single Web UI.
Accessing Web UI
Run Protoplaster in server mode, optionally specifying a port:
protoplaster -d tests/ -r reports/ -a artifacts/ --server --port 5000
Access the Web UI from a web browser using the device’s IP and the specified port:
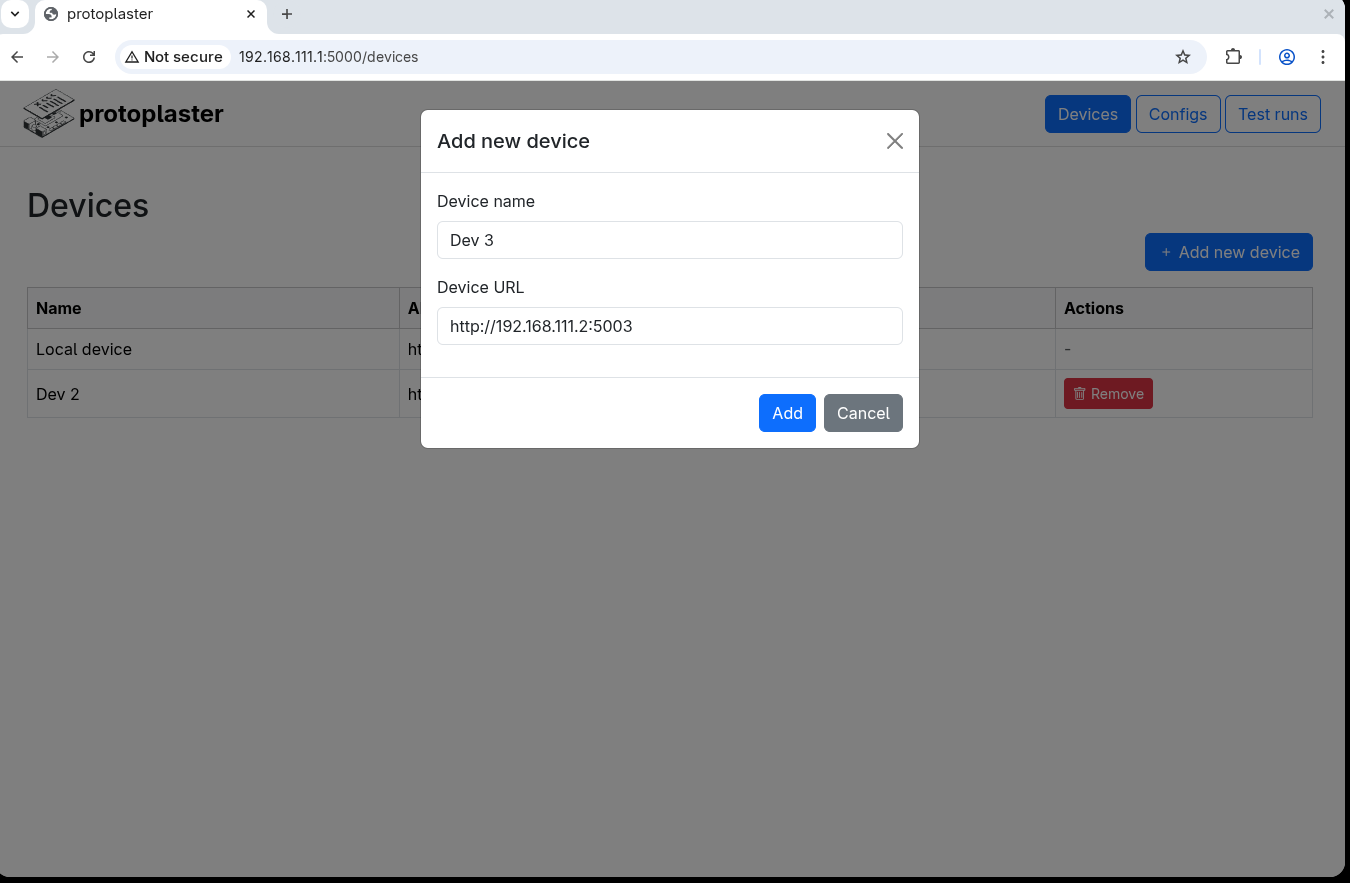
Figure 1 Protoplaster Web UI.
Devices
In the Devices tab, external devices can be added and removed. The local device (the one serving the Web UI) is always present and cannot be removed. To add an external device, first start Protoplaster on it in server mode, then add it using the “Add new device” button, specifying its IP and port on which Protoplaster is running:
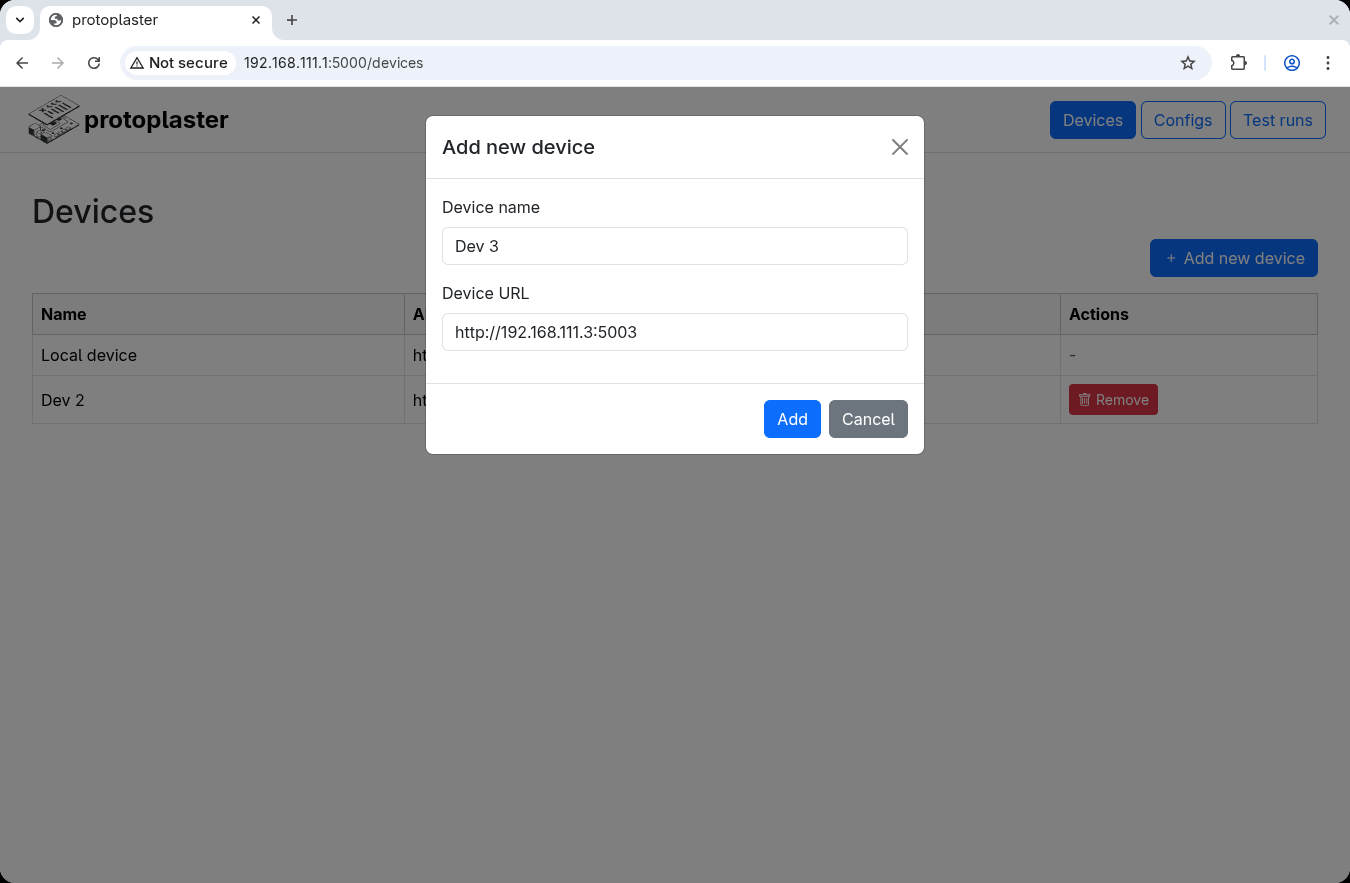
Figure 2 Web UI - adding new device.
Configs
In the Configs tab, all the available configs can be listed for all connected devices. Select the device for which configs are listed using the drop-down on the left. To add a new config, use the “Add new config” button. Configs can be uploaded to multiple devices by selecting more than one in the Devices box:
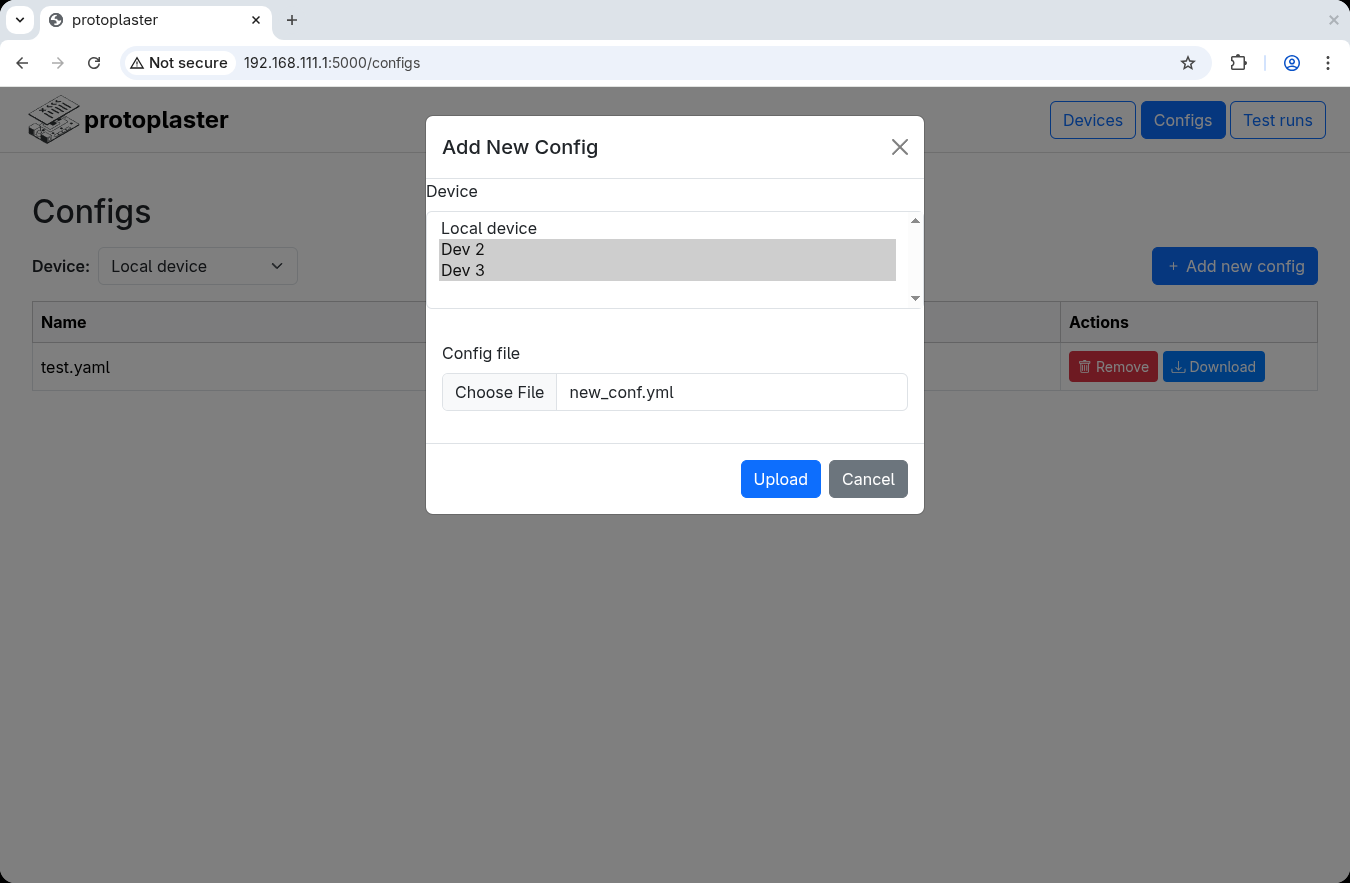
Figure 3 Web UI - adding new config.
Test runs
In the Test runs tab, running and finished test runs can be listed for available devices. Like in the Configs tab, the desired device for which test runs are listed can be selected using the drop-down menu. To trigger a test run, use the “Trigger test run” button. Tests can be triggered on multiple devices, by selecting multiple devices in the Devices box. When multiple devices are selected, the config field will only show configs which are present on all selected devices.
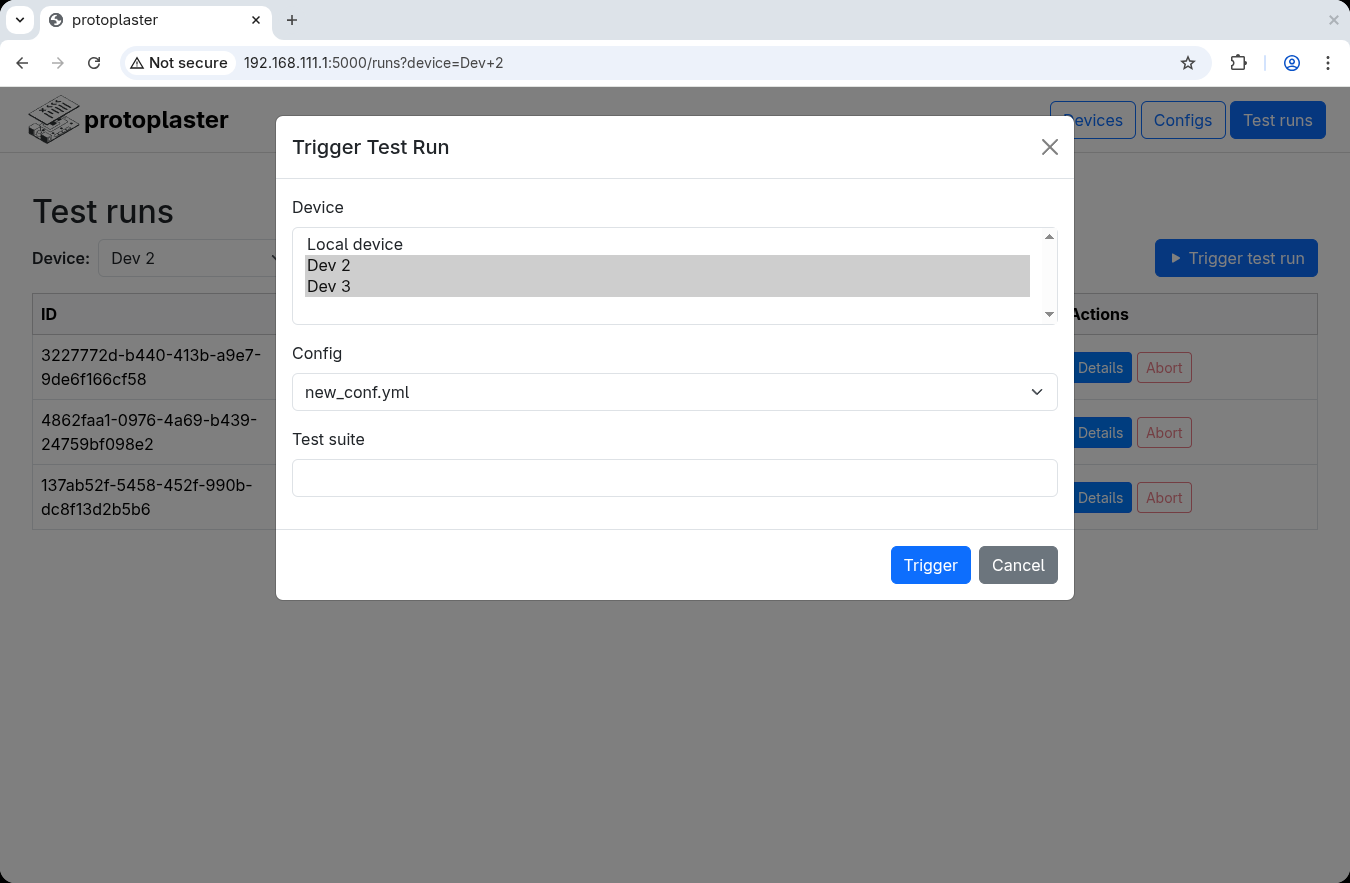
Figure 4 Web UI - adding new config.