DDR5 Tester
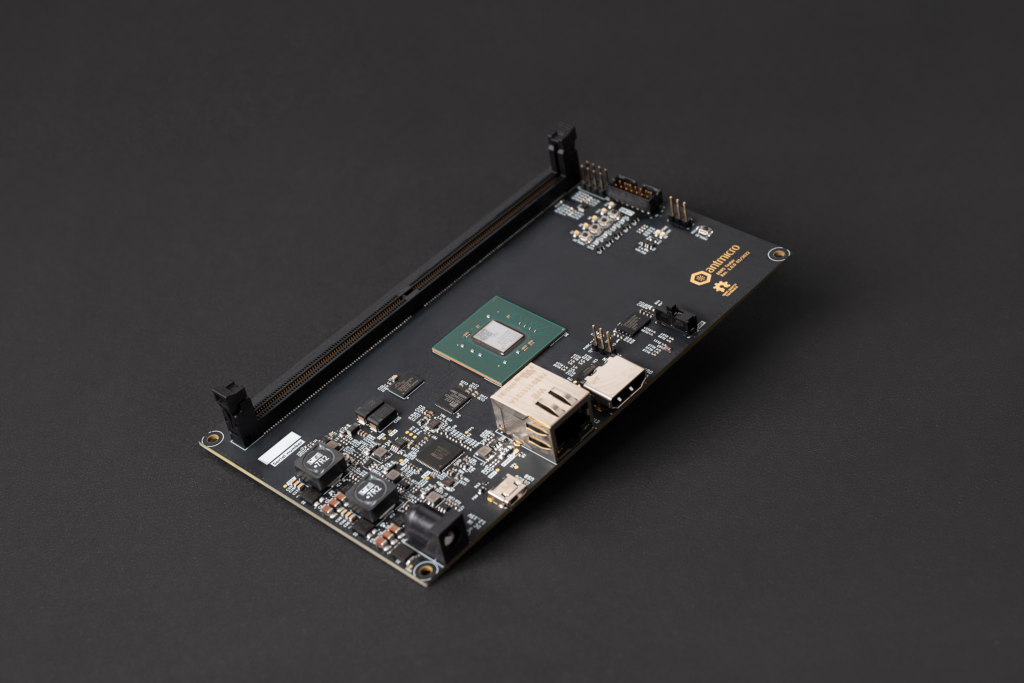
The DDR5 tester is an open source hardware test platform that enables testing and experimenting with various DDR5 RDIMMs (Registered Dual In-Line Memory Module).
The hardware is open and can be found on GitHub: https://github.com/antmicro/ddr5-tester/
The following instructions explain how to set up the board.
Rowhammer Tester Target Configuration
First connect the board USB and Ethernet cables to your computer, plug the board to the socket and turn it on using power switch. Then configure the network. The board’s IP address will be 192.168.100.50 (so you could e.g. use 192.168.100.2/24). The IP_ADDRESS environment variable can be used to modify the board’s address.
Next, generate the FPGA bitstream:
export TARGET=ddr5_tester
make build TARGET_ARGS="--l2-size 256 --build --iodelay-clk-freq 400e6 --bios-lto --rw-bios --module MTC10F1084S1RC --no-sdram-hw-test"
Note
–l2-size 256 sets L2 cache size to 256 bytes
–no-sdram-hw-test disables hw accelerated memory test
Note
By typing make (without build) LiteX will generate build files without invoking Vivado.
The results will be located in: build/ddr5_tester/gateware/antmicro_ddr5_tester.bit. To upload it, use:
export TARGET=ddr5_tester
make upload
To save bitstream in flash memory, use:
export TARGET=ddr5_tester
make flash
Warning
There is a JTAG/SPI jumper named MODE on the right side of the board.
Unless it’s set to the SPI setting, the FPGA will load the bitstream received via JTAG.
Bitstream will be loaded from flash memory upon device power-on or after a PROG button press.
Linux Target Configuration
There’s another DDR5 Tester tagret provided.
The ddr5_tester_linux is a linux capable target (with no rowhammer tester) that allows you to define custom DDR5 tester module utilizing linux-based software.
Base DDR5 Tester Linux Options
The ddr5_tester_linux is configured via specifying TARGET_ARGS variable.
The required arguments for the ddr5_tester_linux are:
Option |
Documentation |
|---|---|
|
When specified will invoke synthesis and hardware analysis tool (Vivado by default). |
|
Specifies the L2 cache size. |
|
IODELAY clock frequency. |
|
The DDR5 module to be used. |
|
VexRiscV SMP specific option. |
|
VexRiscV SMP specific option. |
Additionally, etherbone or ethernet can be set up with either:
Ethernet Options
Option |
Documentation |
|---|---|
|
Sets up ethernet for DDR5 Tester board. |
|
The IP address of the remote machine connected to DDR5 Tester. |
|
Local (DDR5 Tester’s) IP address. |
Etherbone Options
Option |
Documentation |
|---|---|
|
Sets up ethernet for DDR5 Tester board. |
|
IP address to be used for the etherbone. |
|
MAC address to be used for the etherbone. |
Building DDR5 Tester Linux Target
After having configured the DDR5 Tester Linux, the target can be build with make build Makefile target.
Use example of DDR5 Tester Linux Target with ethernet configured:
make build TARGET=ddr5_tester_linux TARGET_ARGS="--build --l2-size 256 --iodelay-clk-freq 400e6 --module MTC10F1084S1RC --with-wishbone-memory --wishbone-force-32b --with-ethernet --remote-ip-address 192.168.100.100 --local-ip-address 192.168.100.50"
Interacting with DDR5 Tester Linux Target
First, load the bitstream onto the DDR5 Tester with the help of the OpenFPGALoader:
openFPGALoader --board antmicro_ddr5_tester build/ddr5_tester_linux/gateware/antmicro_ddr5_tester.bit --freq 3e6
In order to connect to the board, assign IP Address – 192.168.100.100 – to the ethernet interface that is plugged to the DDR5 Tester board and set up the device if needed.
For example by:
ip addr add 192.168.100.100/24 dev $ETH
ip link set dev $ETH up
Where ETH is the name of your ethernet interface.
When the ethernet interface has been set up correctly, you may access the BIOS console on the DDR5 Tester with:
picocom -b 115200 /dev/ttyUSB2
Setting up TFTP Server
From this this point, several linux boot methods can be invoked but booting via ethernet is recommended. In order to enable netboot, the TFTP server needs to be set up first.
Note
Running TFTP server varies between distributions, this can mean different TFTP implementation name and a different location of the configuration file.
As an example, here’s a quick guide on how to configure TFTP server for Arch Linux:
Firstly, if not equipped already, get an implementation of a TFTP server, for example:
pacman -S tftp-hpa
The TFTP server is configured via a /etc/conf.d/tftpd file, here’s a suggested configuration for the DDR5 Tester Linux boot process:
TFTP_USERNAME="tftp"
TFTPD_OPTIONS="--secure"
TFTP_DIRECTORY="/srv/tftp"
TFTP_ADDRESS="192.168.100.100:69"
The TFTP_ADDRESS is the specified –remote-ip-address whilst building the target and the port is the default one for the TFTP server. The TFTP_DIRECTORY is the TFTP’s root directory.
Then, the TFTP service needs to be started:
systemctl start tftpd
To check if the TFTP sever has been set up properly, one may run:
cd /srv/tftp/ && echo "TEST TFTP SERVER" > test

cd ~/ && tftp 192.168.100.100 -c get test
The test file should appear in the home directory with “TEST TFTP SERVER” contents.
Booting Linux on DDR5 Tester Linux Target
You will need the following binaries:
Linux kernel Image
Compiled devicetree
Opensbi’s
fw_jump.binrootfs.cpio
All of those can be obtained with the use of provided buildroot_ext buildroot external configuration.
To build binaries with buildroot run:
git clone --single-branch -b 2023.05.x https://github.com/buildroot/buildroot.git
pushd buildroot
make BR2_EXTERNAL="$(pwd)/../buildroot_ext" ddr5_vexriscv_defconfig
Then, transfer the binaries to the TFTP root directory:
mv buildroot/output/images/* /srv/tftp/
mv /srv/tftp/fw_jump.bin /srv/tftp/opensbi.bin
The address map of the binaries alongside boot args can be contained within the boot.json file, for example:
{
    "/srv/tftp/Image":        "0x40000000",
    "/srv/tftp/rv32.dtb":     "0x40ef0000",
    "/srv/tftp/rootfs.cpio":  "0x42000000",
    "/srv/tftp/opensbi.bin":  "0x40f00000",
    "bootargs": {
        "r1":   "0x00000000",
        "r2":   "0x40ef0000",
        "r3":   "0x00000000",
        "addr": "0x40f00000"
    }
Having placed linux boot binaries in the TFTP’s root directory with boot.json, the netboot can be invoked from BIOS console with:
netboot /srv/tftp/boot.json
Upon successful execution a similar log will be printed:
litex> netboot /srv/tftp/boot.json
Booting from network...
Local IP: 192.168.100.50
Remote IP: 192.168.100.100
Booting from /srv/tftp/boot.json (JSON)...
Copying /srv/tftp/Image to 0x40000000... (7395804 bytes)
Copying /srv/tftp/rv32.dtb to 0x40ef0000... (2463 bytes)
Copying /srv/tftp/rootfs.cpio to 0x42000000... (22128128 bytes)
Copying /srv/tftp/opensbi.bin to 0x40f00000... (1007056 bytes)
Executing booted program at 0x40f00000

--============= Liftoff! ===============--
Then, the Opensbi and Linux boot log should follow:
OpenSBI v1.3-24-g84c6dc1
   ____                    _____ ____ _____
  / __ \                  / ____|  _ \_   _|
 | |  | |_ __   ___ _ __ | (___ | |_) || |
 | |  | | '_ \ / _ \ '_ \ \___ \|  _ < | |
 | |__| | |_) |  __/ | | |____) | |_) || |_
  \____/| .__/ \___|_| |_|_____/|____/_____|
        | |
        |_|

Platform Name             : LiteX / VexRiscv-SMP
Platform Features         : medeleg
Platform HART Count       : 8
Platform IPI Device       : aclint-mswi
Platform Timer Device     : aclint-mtimer @ 100000000Hz
Platform Console Device   : litex_uart
(...)
[    0.000000] Linux version 5.11.0 (riscv32-buildroot-linux-gnu-gcc.br_real (Buildroot 2023.05.2-154-g787a633711) 11.4.0, GNU ld (GNU Binutils) 2.38) #2 SMP Mon Sep 25 10:52:22 CEST 2023
[    0.000000] earlycon: sbi0 at I/O port 0x0 (options '')
[    0.000000] printk: bootconsole [sbi0] enabled
(...)
At the very end you should be greeted with:
Welcome to Buildroot
buildroot login: root
             _     _
            | |   (_)
            | |    _ _ __  _   ___  __
            | |   | | '_ \| | | \ \/ /
            | |___| | | | | |_| |>  <
            \_____/_|_| |_|\__,_/_/\_\
                      _ _   _
                     (_) | | |
            __      ___| |_| |__
            \ \ /\ / / | __| '_ \
             \ V  V /| | |_| | | |
              \_/\_/ |_|\__|_| |_|
            __________________ _____
            |  _  \  _  \ ___ \  ___|
            | | | | | | | |_/ /___ \
            | | | | | | |    /    \ \
            | |/ /| |/ /| |\ \/\__/ /
            |___/ |___/ \_| \_\____/

  32-bit RISC-V Linux running on DDR5 Tester.

login[65]: root login on 'console'